In this tutorial you will learn to create Spring hello world example.
I used Spring 4 in this project but the process is same for any other spring version. Before starting the tutorial make sure you have eclipse and jdk on your system.
Spring Hello World Example
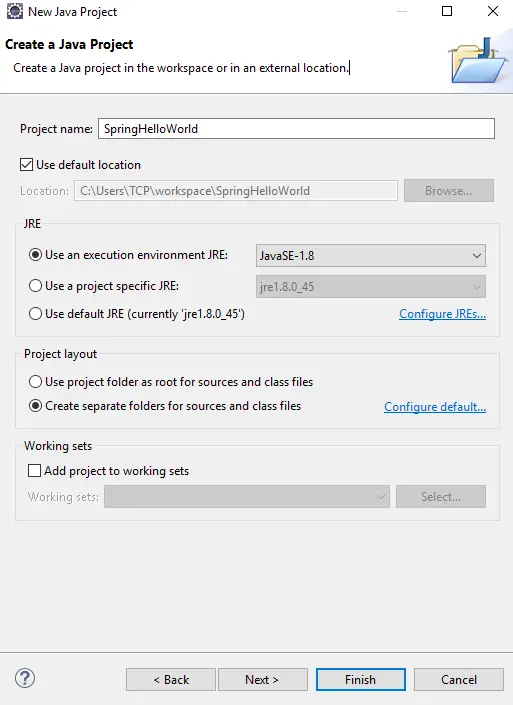
Step 1: Create Java Project
Open eclipse ide and create a java project with any name, here I am creating the project with name SpringHelloWorld. You can create the project by going to File > New > Project > Java > Java Project.
Step 2: Import Spring Jars
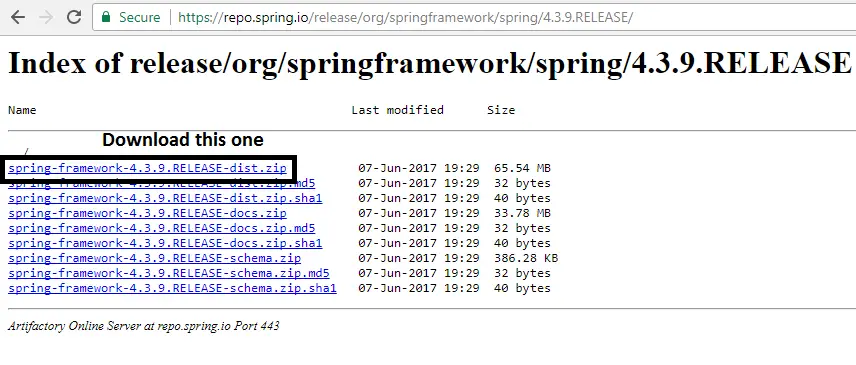
Go to https://repo.spring.io/release/org/springframework/spring/ and download jars for latest version of spring.
It is a zipped file so extract it. Now right click on your project and go to Build Path > Configure Build Path.
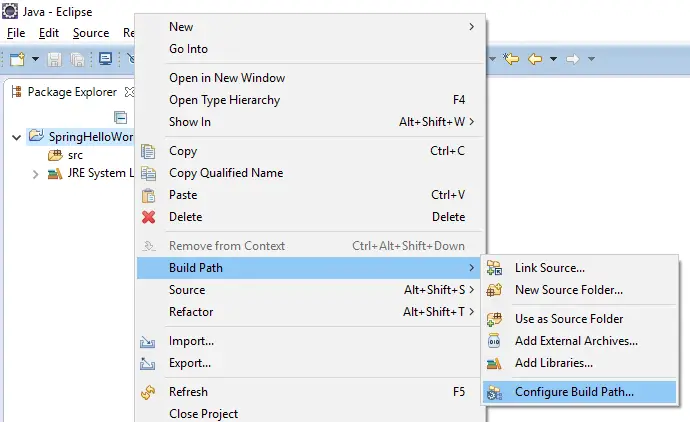
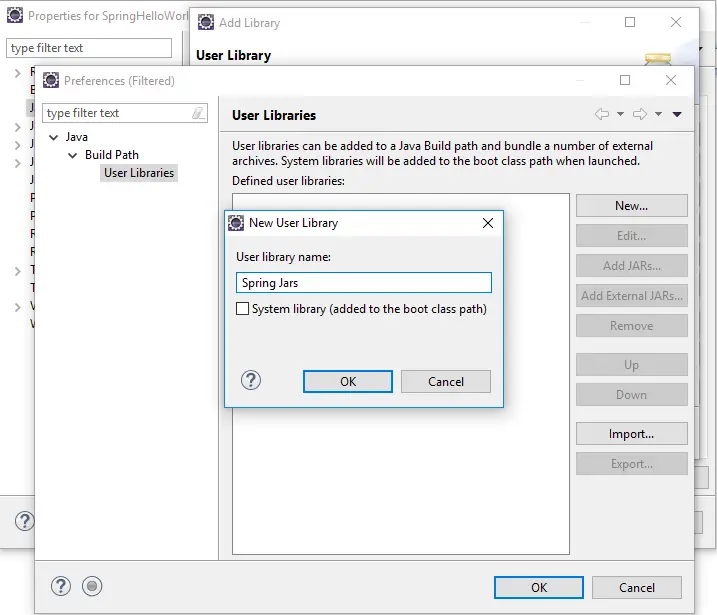
In the next window click on Add Library button and then choose User Library and click Next.
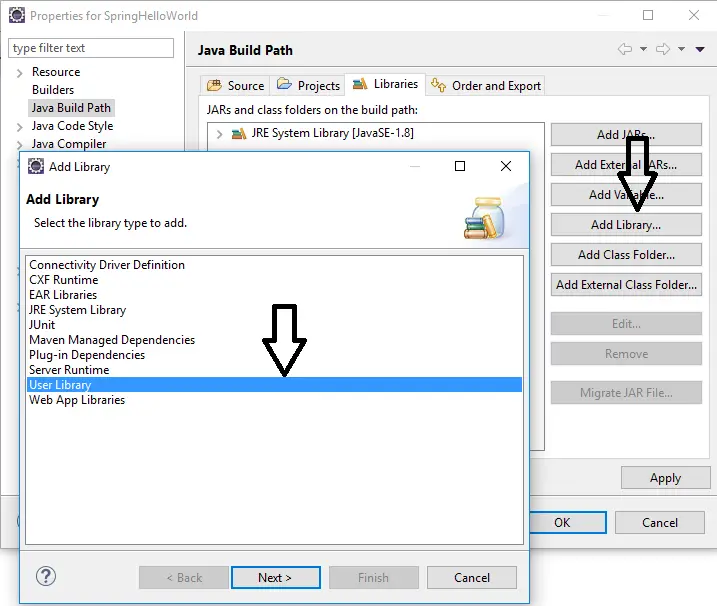
Click on User Libraries button and then click on New. Give the library a name as Spring Jars and Ok to create the library.
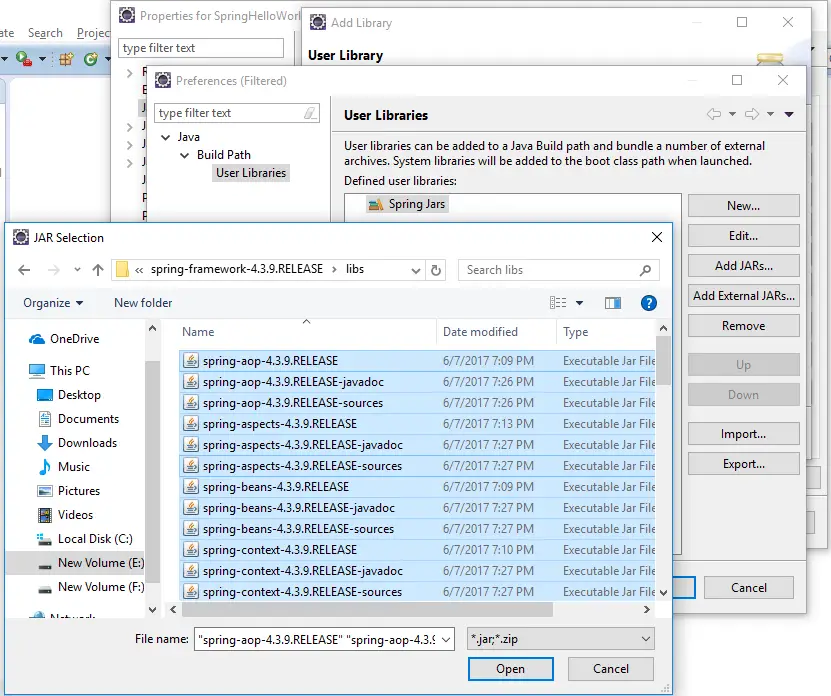
Select Spring Jars and click on Add External JARs button. Browse to the location where you extracted jars and then add them.
We will also need Apache Commons Logging jar so download it from below link and also import it.
https://commons.apache.org/proper/commons-logging/download_logging.cgi
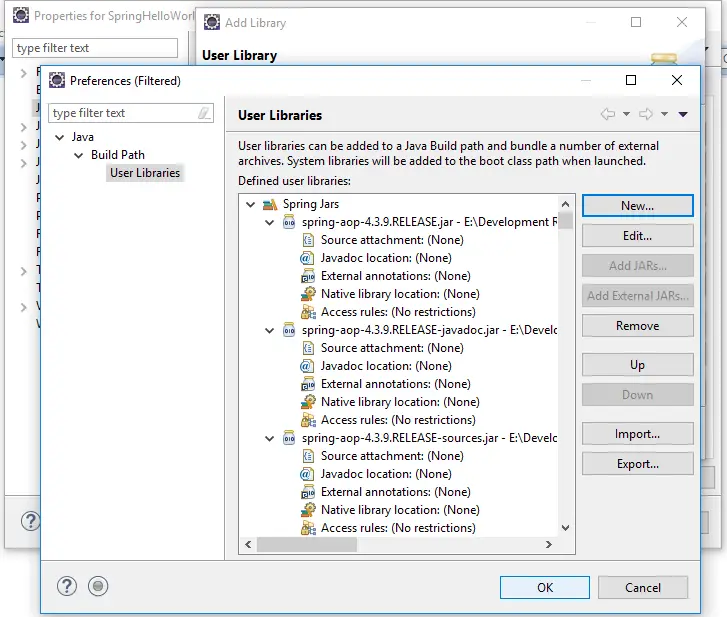
Finally click on Ok, Finish and then Ok button to add jars to project.
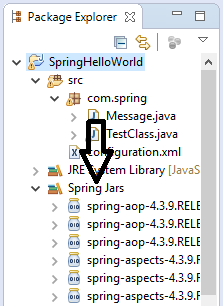
After adding the jars you will see Spring Jars in your project as shown in below image.
Step 3: Create Source Files
Create a package with name com.spring in src folder.
Create a class with name Message inside the package and add following code in it.
Message.java
|
1 2 3 4 5 6 7 |
package com.spring; public class Message { void printMessage(){ System.out.println("Hello World"); } } |
It is responsible for printing the message.
Now create an xml file inside src folder with name configuration.xml, you can create with any other name also. Add following code inside it.
configuration.xml
|
1 2 3 4 5 6 7 8 |
<beans xmlns="http://www.springframework.org/schema/beans" xmlns:xsi="http://www.w3.org/2001/XMLSchema-instance" xsi:schemaLocation="http://www.springframework.org/schema/beans http://www.springframework.org/schema/beans/spring-beans.xsd"> <bean id="messageBean" class="com.spring.Message"> </bean> </beans> |
It is a configuration file that Spring uses to create objects of classes. The outermost tag is <beans></beans> and inside it we can have multiple <bean> tags depending upon for how many classes we want objects. Bean is simply called as object. As in this case Message class is responsible for printing message so we have mentioned it inside <bean> tag using class=”com.spring.Message”. Here id=”messageBean” specifies the name of the object.
Now we will create a test class to test the project.
TestClass.java
|
1 2 3 4 5 6 7 8 9 10 11 12 13 14 15 |
package com.spring; import org.springframework.context.ApplicationContext; import org.springframework.context.support.ClassPathXmlApplicationContext; public class TestClass { public static void main(String[] args) { ApplicationContext context = new ClassPathXmlApplicationContext("configuration.xml"); Message obj = (Message) context.getBean("messageBean"); obj.printMessage(); } } |
Here ApplicationContext is an interface provided by Spring to perform various operations.
|
1 |
ApplicationContext context = new ClassPathXmlApplicationContext("configuration.xml"); |
Above line gives the path of configuration file.
|
1 |
Message obj = (Message) context.getBean("messageBean"); |
In above code we are fetching the object created by Spring container using messageBean id and storing it in reference variable obj. Using this reference variable we will call printMessage() method to print the hello world message.
Step 4: Run Project
For running the project just right click on project and select Run As > Java Application. This will print the message on console as shown in below image.

Comment below if you have any queries regarding above Spring hello world example.
Oh my use Maven already!!!